How to Set Up Terraform State Management using AWS S3 and DynamoDB
Terraform is a widely-used tool that helps provisioning infrastructure. Its power and simplicity made it a popular choice for many developers. However, if used incorrectly, Terraform can cause significant harm, including downtime or even data loss without the possibility of restoration. This becomes particularly relevant when multiple team members work on the same Terraform configuration independently. In this blog post, I will explain how to properly set up Terraform State Management for working in a team.

So what’s the problem with working in a team on the same Terraform configuration?
Every time you execute terraform plan or terraform apply, it shows
what it would update: what resources will be added, updated, or deleted.
It does so by comparing the previous state of the infrastructure with the
actual definitions that you have in the .tf files. This “state” is always stored
somewhere. In the simplest case, it is stored locally in a file together with the
project files. But what if several people want to apply changes to the infrastructure?
In this case, the state has to be stored in a centralized place like an AWS S3 bucket
and fetched every time a new change is being made. After the changes are made, the state
would get updated correspondingly so that the next run would pull the latest changes.
This helps to synchronize the changes made by different people, but it still leaves room for failure. Imagine several people trying to adjust the infrastructure at the same time. It might introduce race conditions. For instance, one developer would add resource A and the second one would add resource B at the same time. Both would receive the same data about state at the beginning of the operation. But once the operations are completed, either state with resource A will be saved or the one with B (depending on which one completes last). This will lead to bugs in the best case or to much worse consequences.
To solve the racing conditions, a common practice is to use locks in the way that you first need to obtain a lock before the apply operation and it can only be released after its completion. If a lock is taken, the execution will pause and wait until it is released. In case of AWS, DynamoDB is a popular tool for managing Terraform locks. A common use case is to create a table with a single row. A script will acquire a lock for this row every time a change is being made and release it afterwards.
Ok, now that the theory is over, let’s start with setting up an empty Terraform project.
mkdir terraform-state-demo
cd terraform-state-demo
Create a file called provider.tf with the following content:
terraform {
  required_providers {
    aws = {
      source  = "hashicorp/aws"
      version = "~> 5.0"
    }
  }
}

provider "aws" {
  region = "us-east-1"
}
This tells Terraform that it would connect to AWS. After you saved the file, execute:
terraform init
This will initialize a local Terraform configuration.
Now create a file called state.tf with the following content:
resource "aws_s3_bucket" "demo_tf_state" {
  bucket = "demo-tf-state-123" #<--- change this to your own unique bucket name
}

resource "aws_s3_bucket_server_side_encryption_configuration" "demo_tf_config" {
  bucket = aws_s3_bucket.demo_tf_state.id
  rule {
    apply_server_side_encryption_by_default {
      sse_algorithm = "AES256"
    }
  }
}

resource "aws_s3_bucket_versioning" "demo_tf_state_versioning" {
  bucket = aws_s3_bucket.demo_tf_state.id
  versioning_configuration {
    status = "Enabled"
  }
}

resource "aws_dynamodb_table" "demo_tf_state_locks" {
  name         = "demo-tf-state-locks"
  billing_mode = "PAY_PER_REQUEST"
  hash_key     = "LockID"
  attribute {
    name = "LockID"
    type = "S"
  }
}
This file describes an S3 bucket and a DynamoDB instance - the resources needed for storing a Terraform state in AWS. Make sure to change the bucket name to your own value. It has to be unique across the AWS region.
Now execute:
terraform apply
Type yes after it offers adding 4 new resources to the infrastructure.
At this point, the resources needed to store the state have been created, but they haven’t been configured for use yet. The state is still stored locally and that is expected. Now let’s tell Terraform to use the newly created resources to store the state in the S3 bucket.
Add the following defintion to state.tf:
terraform {
  backend "s3" {
    bucket         = "demo-tf-state-123" # <-- this is the bucket name from
                                         # the previous step, change it here
    key            = "state/terraform.tfstate"
    region         = "us-east-1"
    dynamodb_table = "demo-tf-state-locks"
    encrypt        = true
  }
}
After the changes are saved, intialize Terraform again in order to move the state to the S3 bucket. Execute:
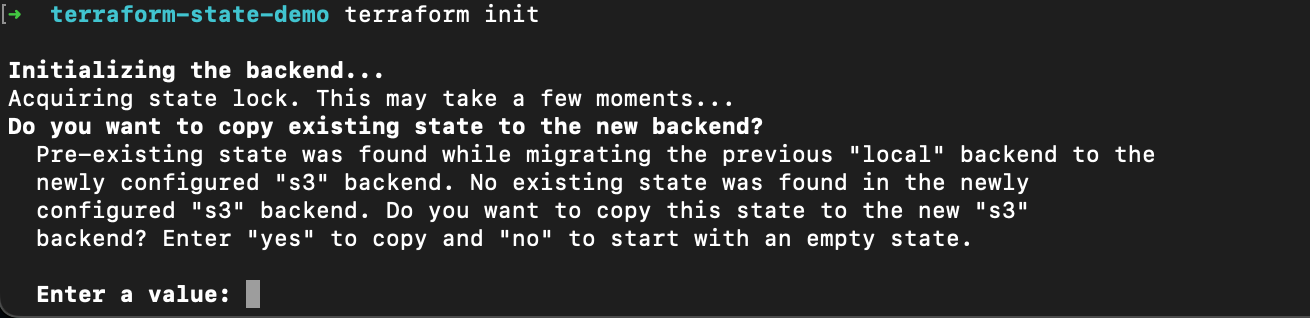
terraform init
This time it would offer you to transfer the local state to the S3 bucket.
Type yes and proceed.
Form this moment on, the Terraform changes would require synchronizing the state
from the S3 bucket as well as acquiring and releasing a lock for every change.
Try executing terraform apply once agin to see the process in action:
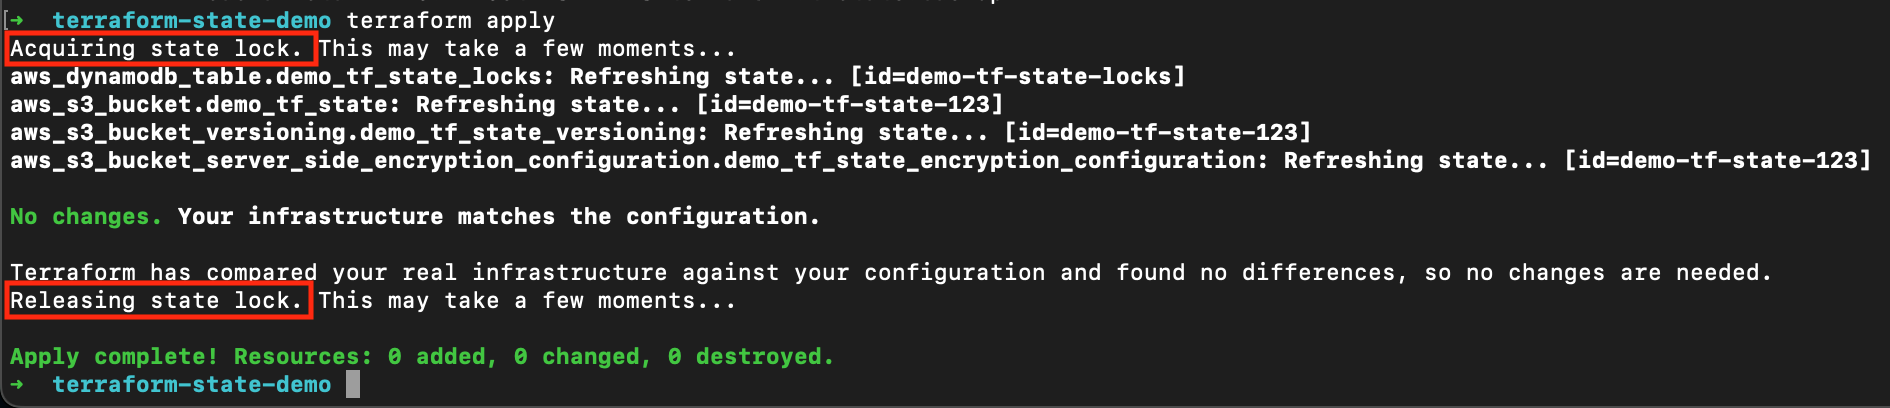
Although no changes have been made, it had to acquire a lock, read the state, and it had to release the lock afterwards.
If you want to find out more about State Management in Terraform, I encourage you to check the documentation.
Thank you for reading and good luck!